Guide to printscreen windows 11: Capture Screenshots Easily
Taking a screenshot on Windows 11 is something you'll probably do all the time, and thankfully, it’s dead simple. The quickest way to grab what's on your screen is by using the Windows key + Print Screen (PrtSc) shortcut. This instantly snaps a picture of your entire display and tucks it away safely in your Pictures > Screenshots folder.
Your First Windows 11 Screenshot: The Basics
Let's get right to it. The most fundamental ways to capture your screen are baked right into your keyboard. These shortcuts are the bedrock of an efficient workflow, whether you're creating a how-to guide, sending an error message to IT support, or just saving a great moment from a video call.
Getting these basics down is more important than ever. As of October 2025, Windows 11 now holds a commanding 61.09% of the desktop Windows market share, according to Statcounter. This means the features we're about to cover are relevant to the vast majority of PC users in the Netherlands and beyond.
Full Screen vs. a Single Window
The most common need is to just capture everything you see. Pressing the Windows key + PrtSc does exactly that. Your screen will likely dim for a split second—that's Windows 11 giving you a visual nod that the screenshot was taken and saved. You can then find the finished PNG file waiting for you in C:Users[YourUsername]PicturesScreenshots.
But what if you don't want your messy desktop, open tabs, and notifications in the shot? Sometimes, you just need a clean image of a specific application. For that, there's a more targeted shortcut: Alt + PrtSc. This combo captures only the active window you're currently working in and copies it straight to your clipboard.
This is my go-to for creating professional-looking images for reports or tutorials without having to crop anything later. Since it's on your clipboard, you can just paste it directly (Ctrl + V) into an email, a chat, a Word document, or an image editor like Paint.
For a bit more context on the fundamentals, general guides on how to screenshot on Windows can be helpful. This diagram also breaks down the basic flow nicely.
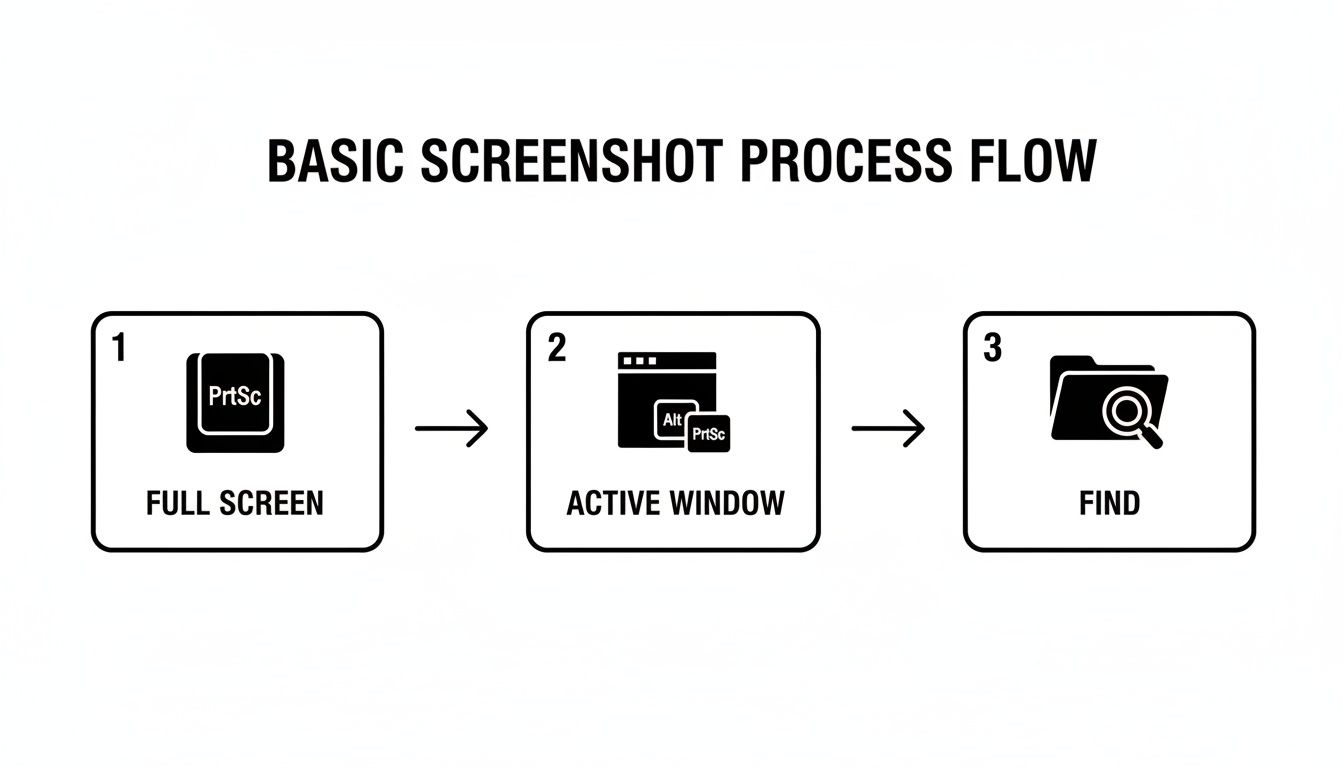
As you can see, it's a simple choice between grabbing everything or just one window, and knowing where the final image ends up.
A Quick Word on Laptop Keyboards
Here’s something that trips people up all the time, especially on laptops. To save space, many manufacturers combine the PrtSc key with another key, like F10 or Insert. If you're on a laptop, you'll probably need to press the Function (Fn) key at the same time.
For instance, to take a full-screen shot on many Dell or HP laptops, the shortcut is actually Fn + Windows key + PrtSc. If a shortcut isn't working for you, the Fn key is almost always the culprit.
It’s a small detail, but it’s the key to making these shortcuts work on compact keyboards. Once you get the hang of these, the logic often carries over to other devices. If you find yourself switching between platforms, you might find our guide on how to take a screenshot on a Samsung tablet useful, as similar principles apply.
https://www.peopleandmedia.com/screenshot-on-samsung-tablet/
Unlocking the Power of the Snipping Tool
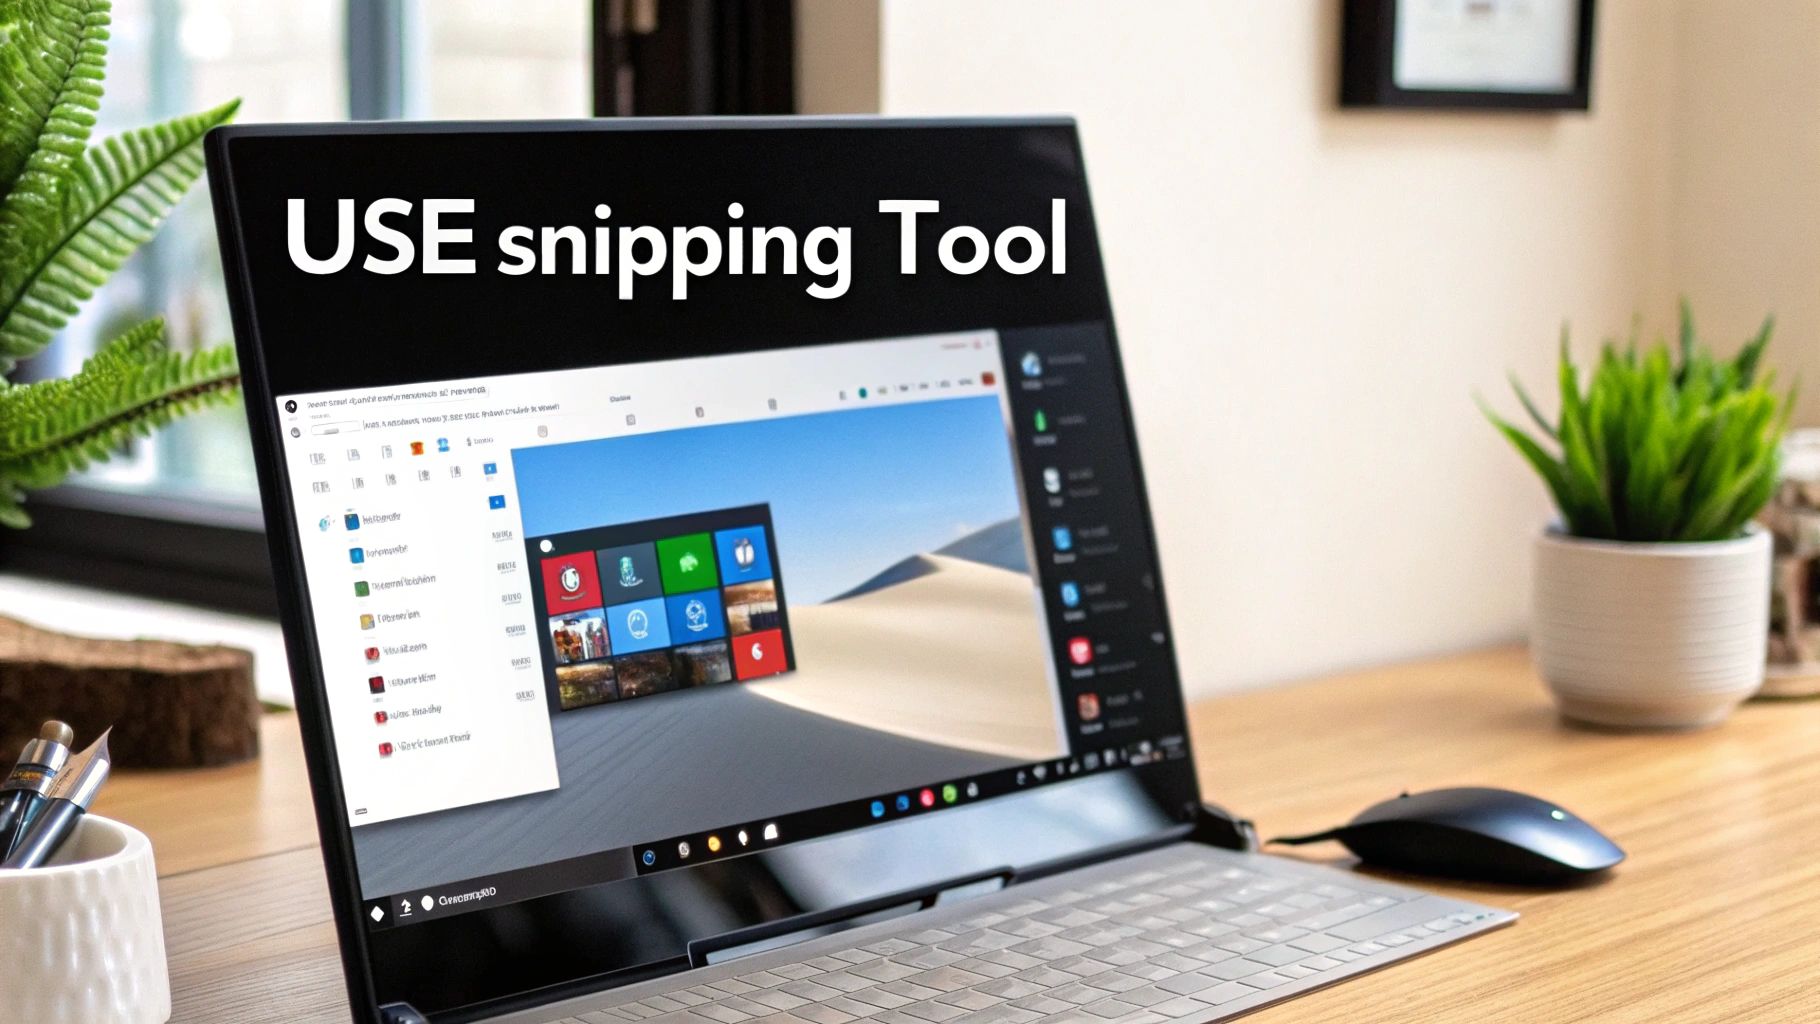
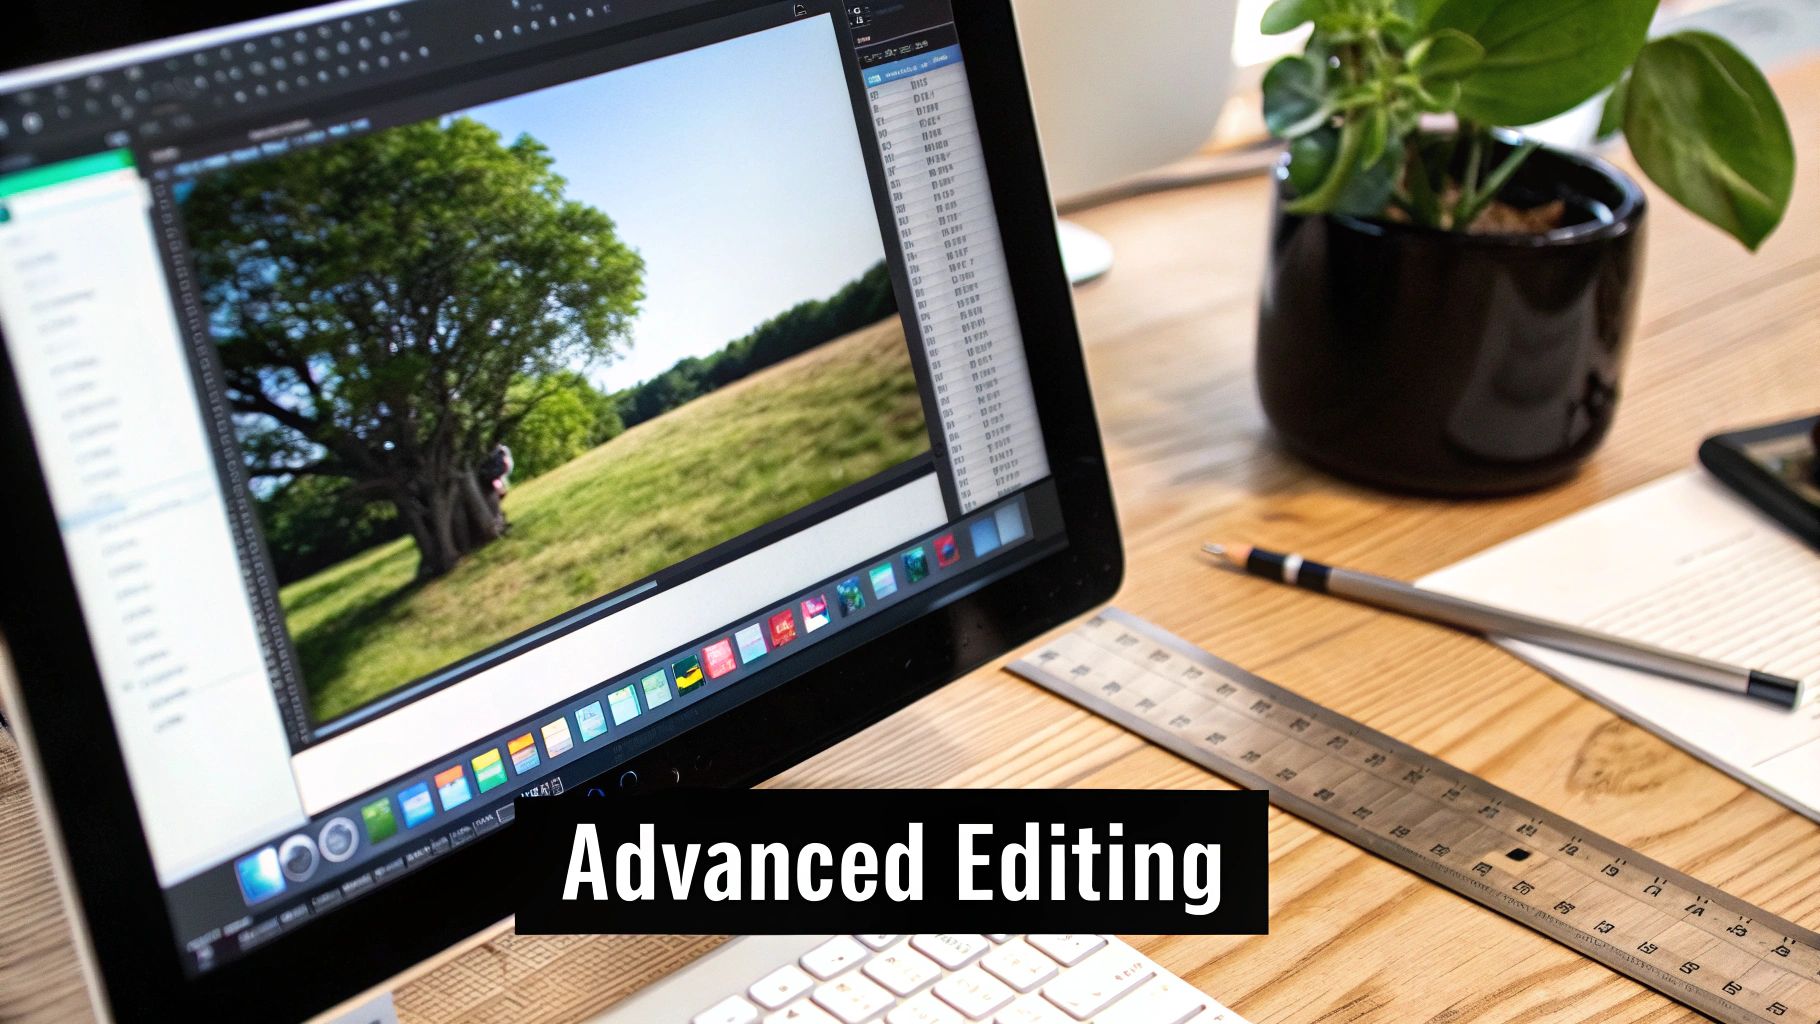
While the basic shortcuts are great for a quick grab, the real magic for taking a printscreen on Windows 11 happens with the Snipping Tool. This isn't just some clunky add-on; it's a surprisingly versatile utility built right into the OS, designed for precision captures and fast edits. Honestly, for most day-to-day tasks, you can forget about hunting for third-party apps.
The quickest way to get started is with the keyboard shortcut Windows key + Shift + S. The moment you press it, your screen dims slightly and a small toolbar pops up at the top. Just like that, your cursor is ready for action.
This is a huge improvement over older Windows versions. With Windows 11, the whole process is smoother and more intuitive. It’s worth noting that on many laptops sold in the Netherlands, the Print Screen key often needs the Fn key held down (Fn + PrtSc) to work. The Windows + Shift + S combo bypasses that completely, making it a reliable, universal shortcut. You can find more detail on specific hardware, like Windows 11 screenshot key functions on dell.com.
Choosing Your Capture Mode
Once that Snipping Tool overlay is active, you've got four distinct capture modes to choose from. Knowing which one to use in the moment will seriously speed up your workflow.
- Rectangular Mode: This is your default, go-to option. Just click and drag a box around the exact area you need. Perfect for grabbing a specific chart out of a report or a quote from an article.
- Freeform Mode: Sometimes a rectangle just won't cut it. This mode lets you draw any shape you want, which is brilliant for capturing irregularly shaped things like a company logo off a website or a specific route on a map.
- Window Mode: A massive time-saver. Instead of trying to draw a perfect box, just hover over an application window. The tool automatically highlights it, and a single click grabs that entire window—nothing else.
- Full-screen Mode: Does exactly what it says on the tin. This captures your entire screen, just like the
Windows + PrtScshortcut. It’s the one to use when you need to show the full context of what’s on your desktop.
Once you've made your selection, the image is automatically copied to your clipboard. A small notification will also appear in the corner of your screen—click it to open the capture straight in the Snipping Tool's editor.
Quick Edits and Annotations
This is where the Snipping Tool really shines. Clicking that notification and opening the editor turns a simple screenshot into a powerful communication tool. It provides a simple but surprisingly effective set of tools for quick markups.
You can grab the pen or highlighter to draw attention to key details. Think circling an important figure in a spreadsheet or highlighting a critical sentence in a document you're sharing. If you accidentally grabbed too much, the crop tool lets you trim the image down to just the essentials.
When you’re done, you can save the image as a file, copy it to your clipboard again, or share it directly to an app like Mail or OneNote. This seamless capture-annotate-share process makes the Snipping Tool an absolute must-have for everyday work.
Customising Your Screenshot Workflow
Taking a great printscreen on Windows 11 is one thing, but making the process feel completely effortless is another. This is where you can go beyond the default shortcuts and really tailor the system to your own workflow, shaving off valuable seconds with every single capture.
Honestly, the single most impactful change you can make is remapping the Print Screen key itself.
Instead of needing to remember the Windows + Shift + S combo, you can set the simple PrtSc key to launch the Snipping Tool directly. This turns a slightly awkward three-key action into a single, intuitive press. It’s a small adjustment that, in my experience, completely changes how often I reach for a screenshot simply because it removes all the friction.
Make PrtSc Launch the Snipping Tool
To get this set up, you don't need any third-party software. The option is built right into Windows 11, though it’s tucked away in a place you might not think to look first.
You’ll find this setting within the Accessibility options. Here’s the quickest way to get there:
- Open the Settings app (the
Windows key + Ishortcut is fastest). - Select Accessibility from the menu on the left.
- Scroll down to the "Interaction" section and click on Keyboard.
- Find the option labelled Use the Print screen key to open Snipping Tool and just flick that toggle to on.
The change takes effect instantly. The next time you press the PrtSc key, your screen will dim and the familiar Snipping Tool overlay will appear, ready for you to pick your capture mode. It’s a true set-it-and-forget-it tweak that makes the whole screenshot process feel far more integrated.
This simple customisation transforms the PrtSc key from a legacy function that just copies your screen to the clipboard into a modern, powerful capture trigger. It’s the very first setting I change on any new Windows 11 machine I set up.
Automate Your Backups with OneDrive
Another fantastic way to streamline your workflow is to automate how your screenshots are saved and stored. If you use Microsoft OneDrive, you can tell it to automatically save every screenshot you take directly to the cloud.
This is incredibly useful for a few reasons:
- Automatic Backup: Your captures are always safe, even if your local machine has a problem.
- Cross-Device Access: A screenshot you take on your desktop is instantly available on your laptop, tablet, or phone through the OneDrive app.
- Effortless Sharing: You can quickly grab a shareable link to any screenshot right from your OneDrive folder without having to upload it first.
To switch this on, just open your OneDrive settings, head to the "Sync and backup" tab, and make sure the "Save screenshots I capture to OneDrive" option is checked. This one small step creates a smarter, more connected workspace, ensuring your important visuals are always exactly where you need them.
Advanced Capturing and Editing Techniques
Once you've got the basics down, Windows 11 offers a whole suite of tools that can take a simple screenshot and turn it into something genuinely useful. These features, mostly packed into the Snipping Tool, let you make more dynamic captures and detailed edits—perfect for when you're creating clear instructions, reporting a tricky bug, or just putting together visuals for a presentation. Getting the hang of these will seriously level up the quality of your screen captures.
One of the most powerful, and frankly underused, features is video recording. Instead of snapping a dozen screenshots to show someone a process, you can now record a quick video clip right from the Snipping Tool. This is brilliant for making quick tutorials, demonstrating a software workflow, or even catching an intermittent bug right as it happens. You end up with an MP4 file that’s easy to share and often gets the point across much faster than a series of static images ever could.
Mastering Precision Captures
Ever tried to screenshot a dropdown menu or a tooltip, only for it to vanish the second you move your mouse to grab the shot? It’s a classic frustration, but the Snipping Tool has an elegant solution: the Delay feature.
This nifty function lets you set a timer for 3, 5, or 10 seconds. You just click 'New,' pick your delay, and the countdown starts. This gives you plenty of time to open the exact menu, hover over the right element, or trigger that specific pop-up you need to capture. When the timer runs out, the screen freezes with the capture overlay ready to go, letting you snip that elusive element with perfect timing.
This delay timer is a complete game-changer for anyone documenting user interfaces. It gets rid of all the clumsy workarounds we used to need for capturing temporary UI elements, making sure your instructional content is both accurate and professional.
Professional Editing and Annotation
A raw screenshot is rarely ready to be shared in a professional setting. Luckily, the Snipping Tool's built-in editor has the essential tools you need to clean things up. The ruler, for instance, helps you draw perfectly straight lines or arrows, giving your annotations a clean, polished look. You can even use the protractor to measure and draw angles if you need to be precise.
If you're sharing something with sensitive information, the text redaction tool is invaluable. Instead of messily scribbling over private details, this feature lets you cleanly black out text like email addresses, names, or account numbers. This keeps things private without making the whole image look like a mess. Beyond just pointing things out, understanding how to annotate a screenshot effectively can make a world of difference.
These editing tools transform the Snipping Tool from a simple capture utility into a surprisingly capable, lightweight editing suite.
Snipping Tool Features for Content Creators
For creators, the Snipping Tool is more than just a quick grab-and-go utility. Its features can be strategically used to produce clearer, more engaging instructional content.
| Feature | Best Use Case | Pro Tip |
|---|---|---|
| Video Recording | Creating mini-tutorials or demonstrating multi-step software processes. | Record without audio first for a clean visual, then add a voiceover later for a more polished tutorial. |
| Delay Timer | Capturing tooltips, hover states, and dropdown menus that disappear on mouse-click. | Use the 10-second delay for complex UI interactions that require multiple clicks to set up before capturing. |
| Ruler & Protractor | Adding precise, professional-looking lines, arrows, or angular highlights to technical diagrams. | Hold the Shift key while using the pen with the ruler to snap to perfect horizontal, vertical, or 45-degree angles. |
| Text Redaction | Obscuring sensitive personal or customer data in screenshots for public guides or bug reports. | Double-check the redaction by zooming in. A slightly larger black box is better than accidentally leaking info. |
| Text Actions | Quickly copying text directly from a screenshot to paste into documentation or a command line. | This is great for grabbing error codes or snippets of text from images where you can't normally copy-paste. |
While it's not going to replace a full-blown image editor, for quick markups and getting an image ready to share, it’s often all you need.
Of course, if your work demands more complex edits like layering or advanced colour correction, you might want to explore some of the top free and paid alternatives to Adobe Photoshop that offer more firepower. Ultimately, combining a precise capture with thoughtful editing is the key to creating a truly effective printscreen in Windows 11.
How to Fix Common Printscreen Problems
Even a tool as reliable as the printscreen on Windows 11 can hit a snag now and then. One minute you're capturing your screen, the next you're staring at a black rectangle or wondering why the Print Screen key suddenly stopped working. It’s frustrating, but don't worry—most of these issues are surprisingly easy to fix.
If your PrtSc key isn't responding, the most likely culprit is another application running in the background. Certain programs, especially cloud storage services like OneDrive (if it’s not set up for screenshots), screen recorders, or remote desktop tools, can hijack the key for their own purposes. A quick fix is to start closing any recently opened apps one by one and test the key after each. You'll often find the offender pretty quickly.
The Mystery of the Black Screen
Ever tried to screenshot a movie or a game, only to end up with a useless black image? This isn't a glitch in your system; it's almost always an intentional feature designed to protect content.
This happens for a couple of key reasons:
- Digital Rights Management (DRM): Streaming services like Netflix and Amazon Prime Video use DRM to stop people from copying their content. When you try to screenshot their video player, the software deliberately blocks the capture, giving you a black screen to protect their copyrighted material.
- Hardware Overlay: Many video games and media players use a hardware overlay to render visuals more efficiently directly on your graphics card. This process is great for performance, but it means standard screenshot tools can't "see" the image, leading to a blank capture.
When you run into this with games, your best bet is to use the Xbox Game Bar (Windows key + G). It's built to work with how games render graphics. For protected video content, however, you're usually out of luck – screenshots are blocked by design.
When Screenshots Go Missing
Another classic problem is taking a screenshot and then having no idea where it went. If you're using the Snipping Tool (Windows + Shift + S), remember it doesn't automatically save your captures. By default, it just copies the image to your clipboard. You need to click the notification that pops up to open the editor and save it as a file.
What if you're not seeing your screenshots in the usual Pictures > Screenshots folder? Windows 11 might be sending them to a temporary cache instead. You can find these lost files in a hidden folder, usually located at %LOCALAPPDATA%PackagesMicrosoft.ScreenSketch_8wekyb3d8bbweTempStateSnips.
It's an either/or situation. Screenshots are saved either to your designated Pictures folder or to this temporary
Snipsfolder, but never both at the same time. If you can't find a screenshot in one place, it's almost certainly in the other.
Finally, if none of these tips work, it's worth checking your drivers. An outdated keyboard or display driver can sometimes interfere with system-level functions like printscreen. A quick trip to Windows Update and a check for updates under "Advanced options > Optional updates" can often resolve these deeper hardware conflicts without much fuss.
The Future of Screenshots with Windows Recall
The way we take screenshots is about to change, moving from a deliberate, manual action to something far more automated and intelligent. While the classic printscreen on Windows 11 will always have its place, new Copilot+ PCs are introducing a truly ambitious AI-powered feature called Recall. This isn't just another tool—it represents a fundamental shift in how we interact with our own digital history.
Think of it as giving your computer a "photographic memory." That's the core idea behind Recall. Instead of you deciding when to press a button, the system continuously captures snapshots of your activity. It creates a searchable, visual timeline of pretty much everything you've ever done on your machine. You could literally scroll back in time or just type a natural language search like, "find that chicken recipe I was looking at last week," and Recall would pull up the exact moment.
A New Era of Personal Productivity
The potential here for productivity is massive. Forgetting where you saw a piece of information or losing track of a source could become a thing of the past.
- Effortless Information Retrieval: Instantly pull up a website, document, or chat you viewed days or even weeks ago, without needing to remember the specific filename or URL.
- Contextual Understanding: Recall is designed to analyse the content of these snapshots, helping you find things based on visual cues or text buried inside an image.
- Enhanced Workflows: If you're a creative professional or a researcher, this creates an automatic, visual log of your work. Retracing your steps or revisiting an earlier idea suddenly becomes incredibly simple.
This pivot towards AI-driven capture is a significant move in personal computing. You can see how this fits into the bigger picture by reading more about how Microsoft is integrating Copilot into business.
Recall essentially turns your passive screen into an active, queryable database of your personal activity. It’s a powerful concept that could make finding information as easy as remembering you saw it.
The Privacy Conundrum
Of course, this kind of power comes with some serious questions. A system that constantly records everything you do on your screen has, quite understandably, set off some major privacy alarms. While Recall promises a 'photographic memory' for your PC, critics have quickly labelled it a potential 'privacy nightmare' because of its comprehensive monitoring. You can get a sense of this heated debate on YouTube.
Microsoft has been quick to state that all the processing happens locally on the device, and that you have full control over what gets captured. Still, the mere existence of such a detailed, locally stored timeline creates a high-value target for security threats. If your device were compromised, an attacker could gain access to an unprecedented amount of sensitive personal and professional data.
As this technology rolls out, the central issue will be balancing its incredible utility against the critical need for robust security and user control. It's definitely one to watch.
Got Questions About Windows 11 Screenshots? We’ve Got Answers.
Even with all the options available, you might still run into a few head-scratchers when trying to get that perfect printscreen on Windows 11. Let's clear up some of the most common questions and get you back on track.
Where Did My Screenshot Go When I Only Hit PrtSc?
If you just pressed the PrtSc key by itself, you might be wondering where the image file is. The short answer is: there isn’t one.
Tapping PrtSc alone doesn't save a file to your computer. Instead, it copies the entire screen to your clipboard, just like highlighting text and hitting Ctrl + C. To actually use the image, you need to paste it somewhere. Open up Paint, a Word document, or even a new email and press Ctrl + V to paste your capture.
The combination that automatically saves a file is Windows + PrtSc, which sends a PNG right to your Pictures > Screenshots folder.
Think of the simple Print Screen key as a temporary copy. It’s held in memory, waiting for you to paste it into its final home. If you don't paste it before copying something else, it's gone.
Can I Take a Scrolling Screenshot?
This is a big one. Unfortunately, the built-in Snipping Tool on Windows 11 doesn't have a native scrolling capture feature. You can't capture a long webpage or a multi-page document in one continuous shot using Microsoft's default tools.
So, what's the solution? You'll have to look at third-party tools. Plenty of excellent browser extensions and dedicated apps are designed for this exact task. A popular and powerful free option is ShareX, which offers scrolling captures alongside a whole suite of other advanced screenshot features.
Why Is My Screenshot Just a Black Screen?
Ever tried to capture a moment from your favourite streaming service or a game, only to end up with a useless black box? It's a common issue, and it's almost always happening for a reason.
This usually boils down to one of two things:
- Digital Rights Management (DRM): Services like Netflix or Prime Video use DRM to protect their content from being copied. This protection is smart enough to block screen captures, and there’s no getting around it.
- Hardware Overlay: Many games render graphics in a special way that standard screenshot tools can't "see." For gaming, your best bet is the Xbox Game Bar. Just press Windows + G to bring it up—it's specifically designed to work with games when other tools fail.
When it comes to protected video content, the black screen is intentional. The service provider is actively preventing you from taking a screenshot.
At People & Media B.V., we believe in making learning accessible and practical. Explore our blogs, courses, and events designed to help you master new skills and gain fresh perspectives. https://www.peopleandmedia.com


Responses